Build and publish your web pages - Tutorials to quick-start your projects
Each graduation project and each School have a an automatically generated Project assigned to them. Within Projects, assigned users can work on building and publishing web pages, and create and schedule Exposure events. In this way, students present their graduation project, and Schools present their Academy and respective fields of study.
Topics covered in this tutorial:
- What is a project
- What is a presentation
- Locate your project
- Make a sketch of what you want to build
- Prepare and gather the content
- Upload project files
- Start building your page
- Using content widgets
- Widgets overview
- Publishing
Step 1 - Definitions - What is a Project
A Project is a (collaborative) workspace where various content types can be created and published. Any number of users can take part in a project. Once a project has been created by a system admin, you will have one of a few possible roles within the project. Account manager or Content manager being the most relevant. When you are the Account manager for a project, you can manage all aspects of the project, including adding or removing users, adding or deleting content. An Account manager can also schedule events, and use the mama.mailer.
Generally an account manager wil make sure everything is in place and content is approved for publication. At which point other participants, or Content managers in the project can start building Presentations (in the form of media rich web-pages) using content in various kinds of ways, both inside the project or externally on other systems or play-out devices. For the purpose of this tutorial all content is used to build presentations (your web-pages).
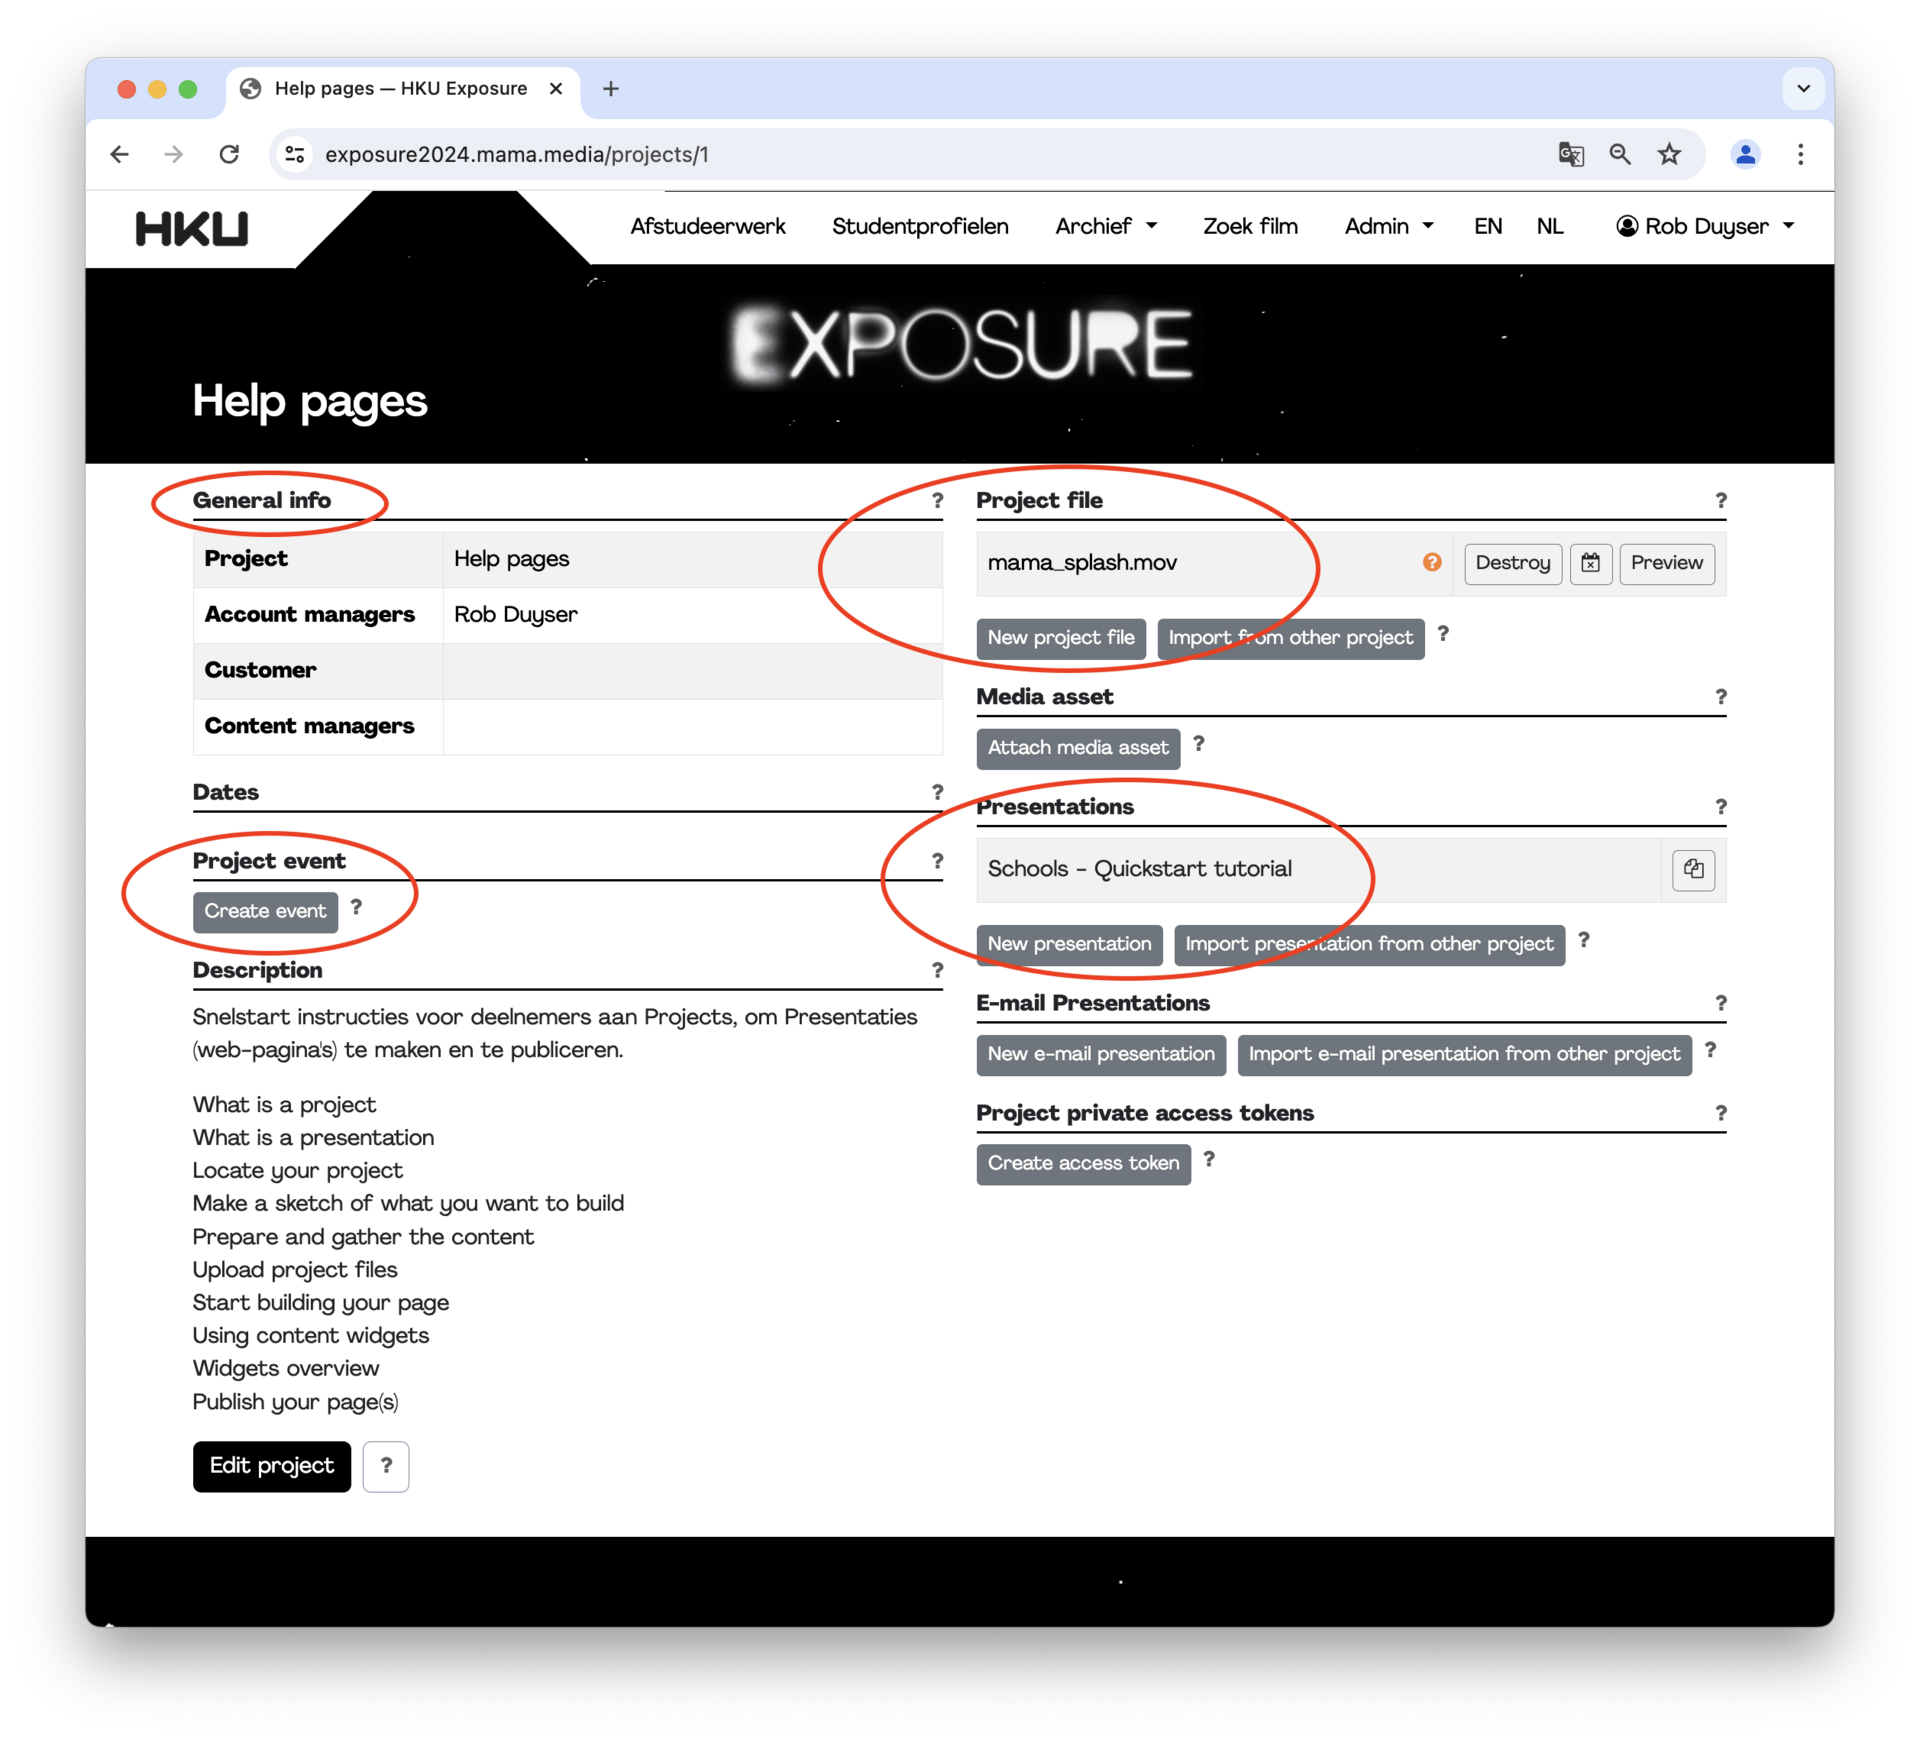
Within a Project there are four main sections where, depending on your role, different content types can be created and published. There is a General info section, where one can see who's who, and if there are any milestones or deadlines attached to this project. Mostly, the name of the project, and who is involved will be telling enough. Project events can be created by Account managers, and added to te events schedule. Project files is where you can upload and download, images and video files that you would like to use in the your presentations. The Presentations section is where you add and new web-pages to be published on your the Hku exposure platform.
Step 2 - Locate your project
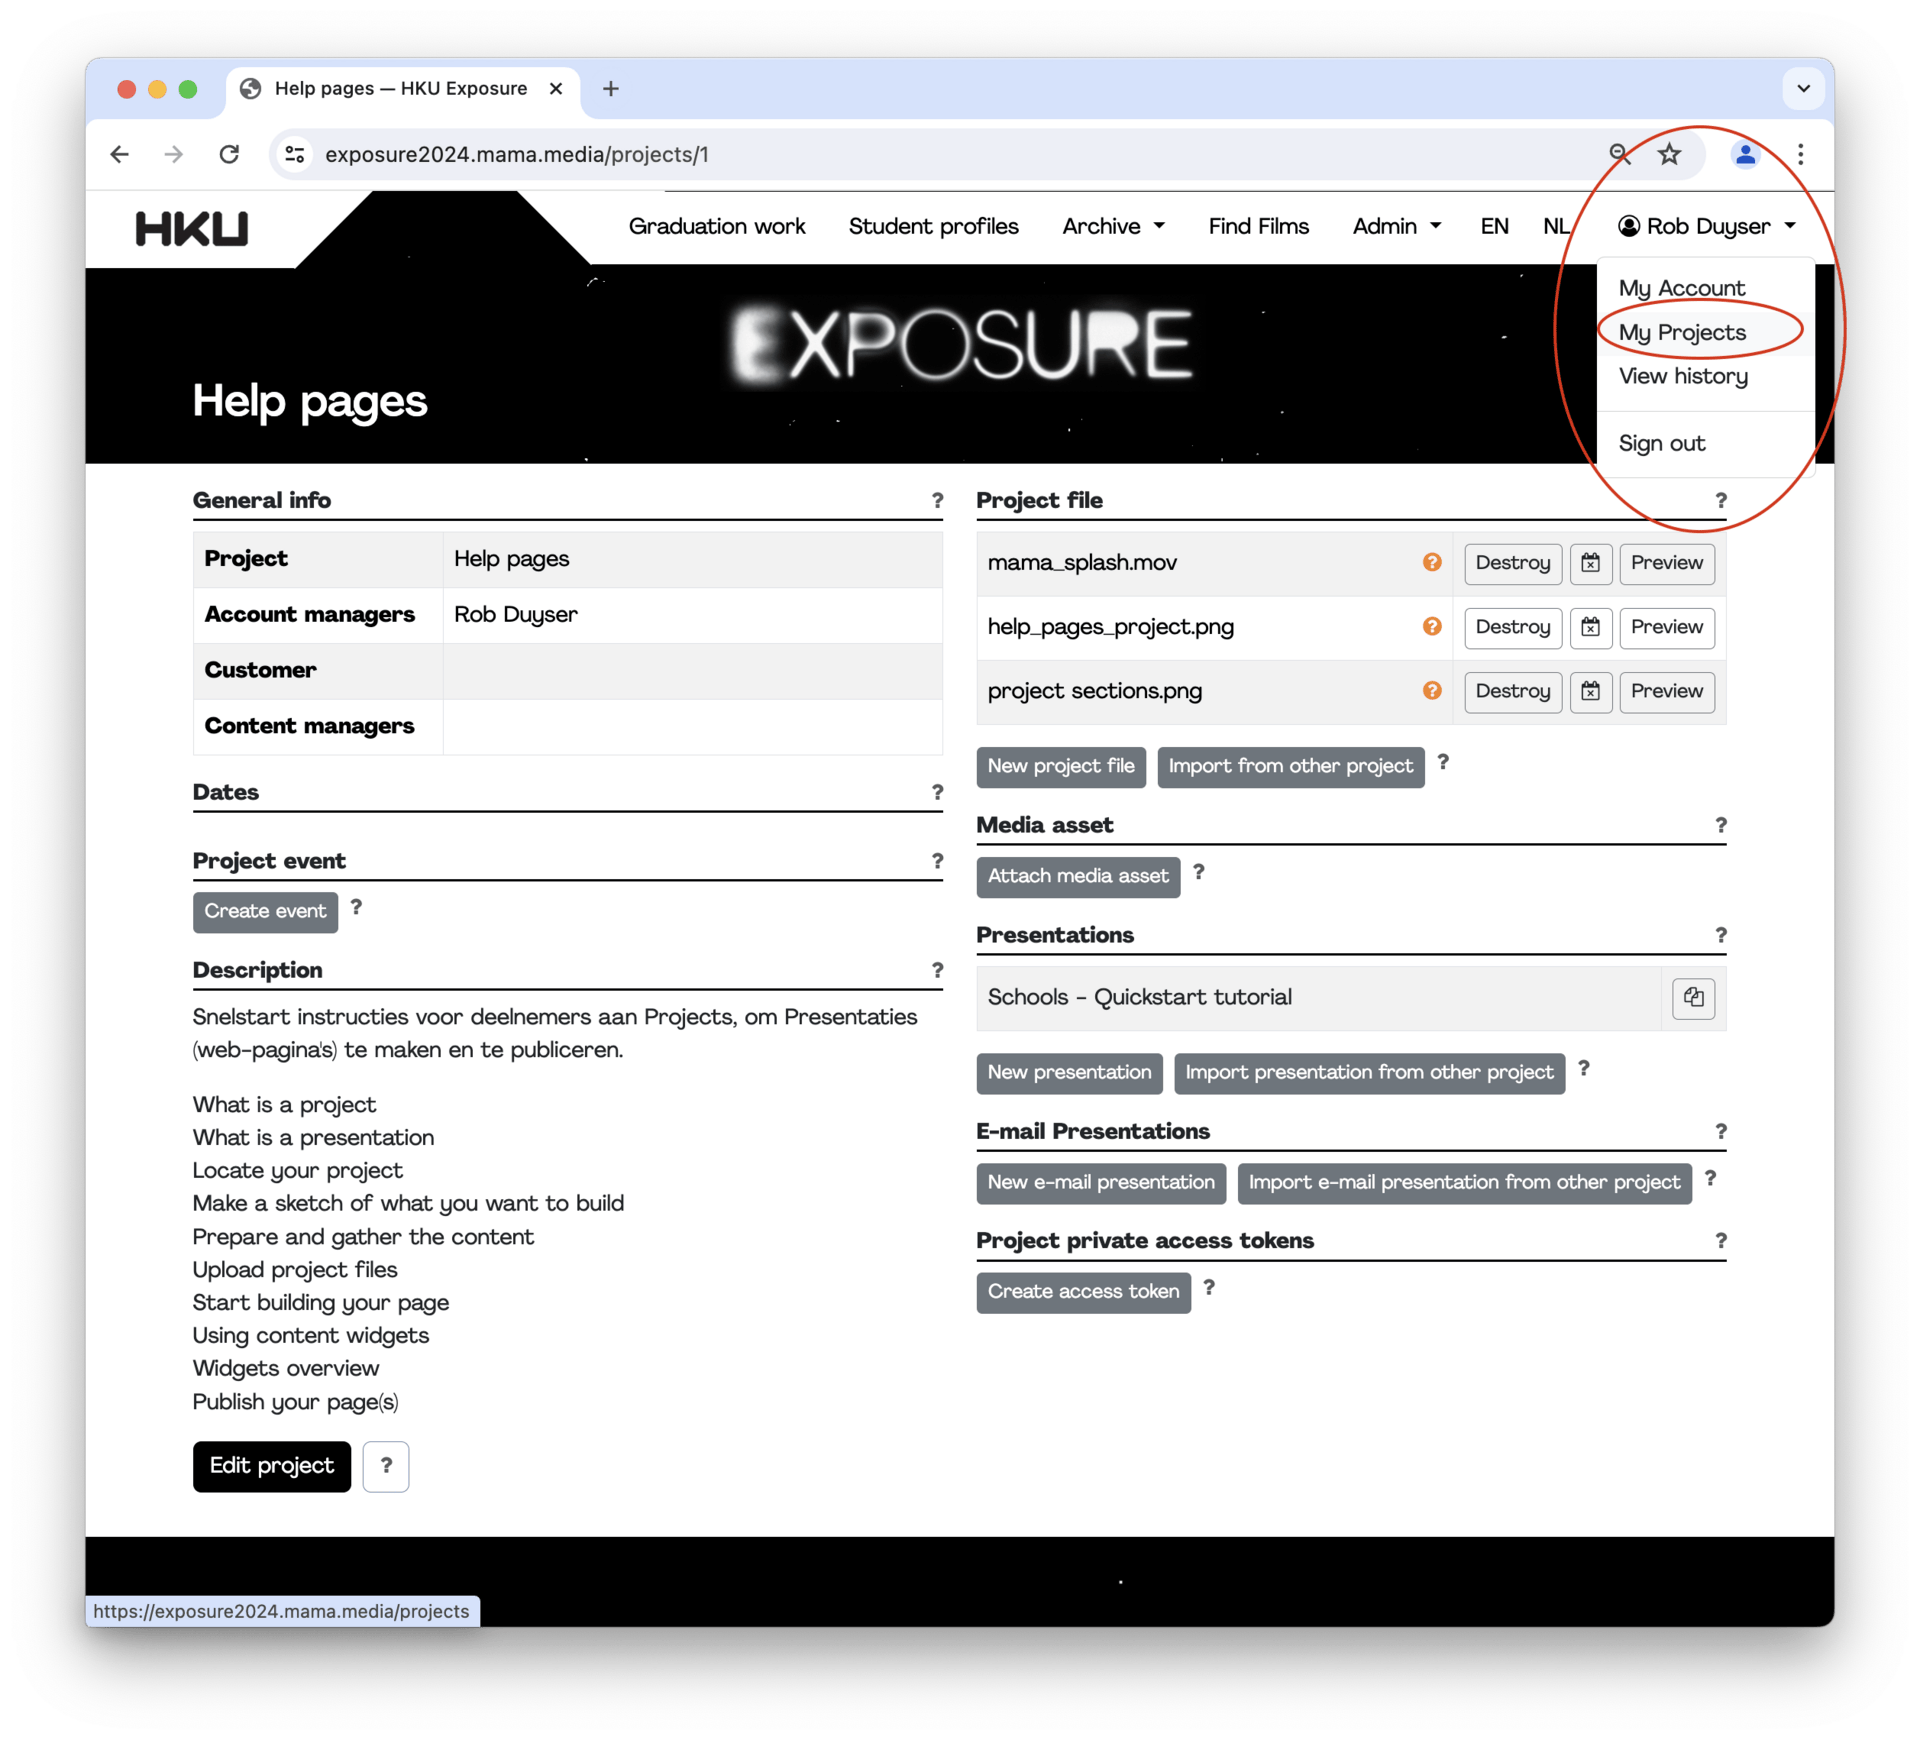
You are building pages here on hku.exposure for one of a number of reasons. Either you are a graduate, in which case congratulations, or you are a Hku staff member, and need to publish on behalf of your School, to publish your exposure events, or if you are an administrator. Generally speaking projects will have been created for you for one of these specific reasons. If you are a graduate then, make sure you are signed in, then goto your name top right of the page. You will need to sign in first, using your HKU student credentials. Then click on your name, and then My projects.
Step 3 - Prepare
It's good to make a sketch of what you want to build before starting. Then work on your computer to gather your texts, any content, images, buttons, videos, pdf files. You can also present webGL files, run live streams, or conference calls, and a few other things, using content widgets. The are various widgets, usually one for a specific purpose, like adding a file your page, or a live stream, or to embed any YouTube or Vimeo video's, or to add any custom code, using the raw html widget. Have a look at the example pages, and determine what you want to present. Student graduation project data is imported and placed in your project automatically. A standard web page is created via a template and published in the graduation projects section. This page can be replaced or altered by going through the steps outlined in this tutorial.

Step 4 - upload your files
Once you have gathered all your content, it is easy to upload all your files with one drag and drop. See the video to the right. Wait for all the uploads to complete, and then close the uploader. It is good practice to use fils that are easily to present on a web-page. Use appropriate resolutions, and image compression to ensure that your files are easy to handle, and will display well for anyone viewing your web-pages.
Step 5 - Build or edit your presentation pages
In the Presentation section of your project, you can either find a page that has been automatically generated for you, or you can create a new one, and start making a presentation form scratch.
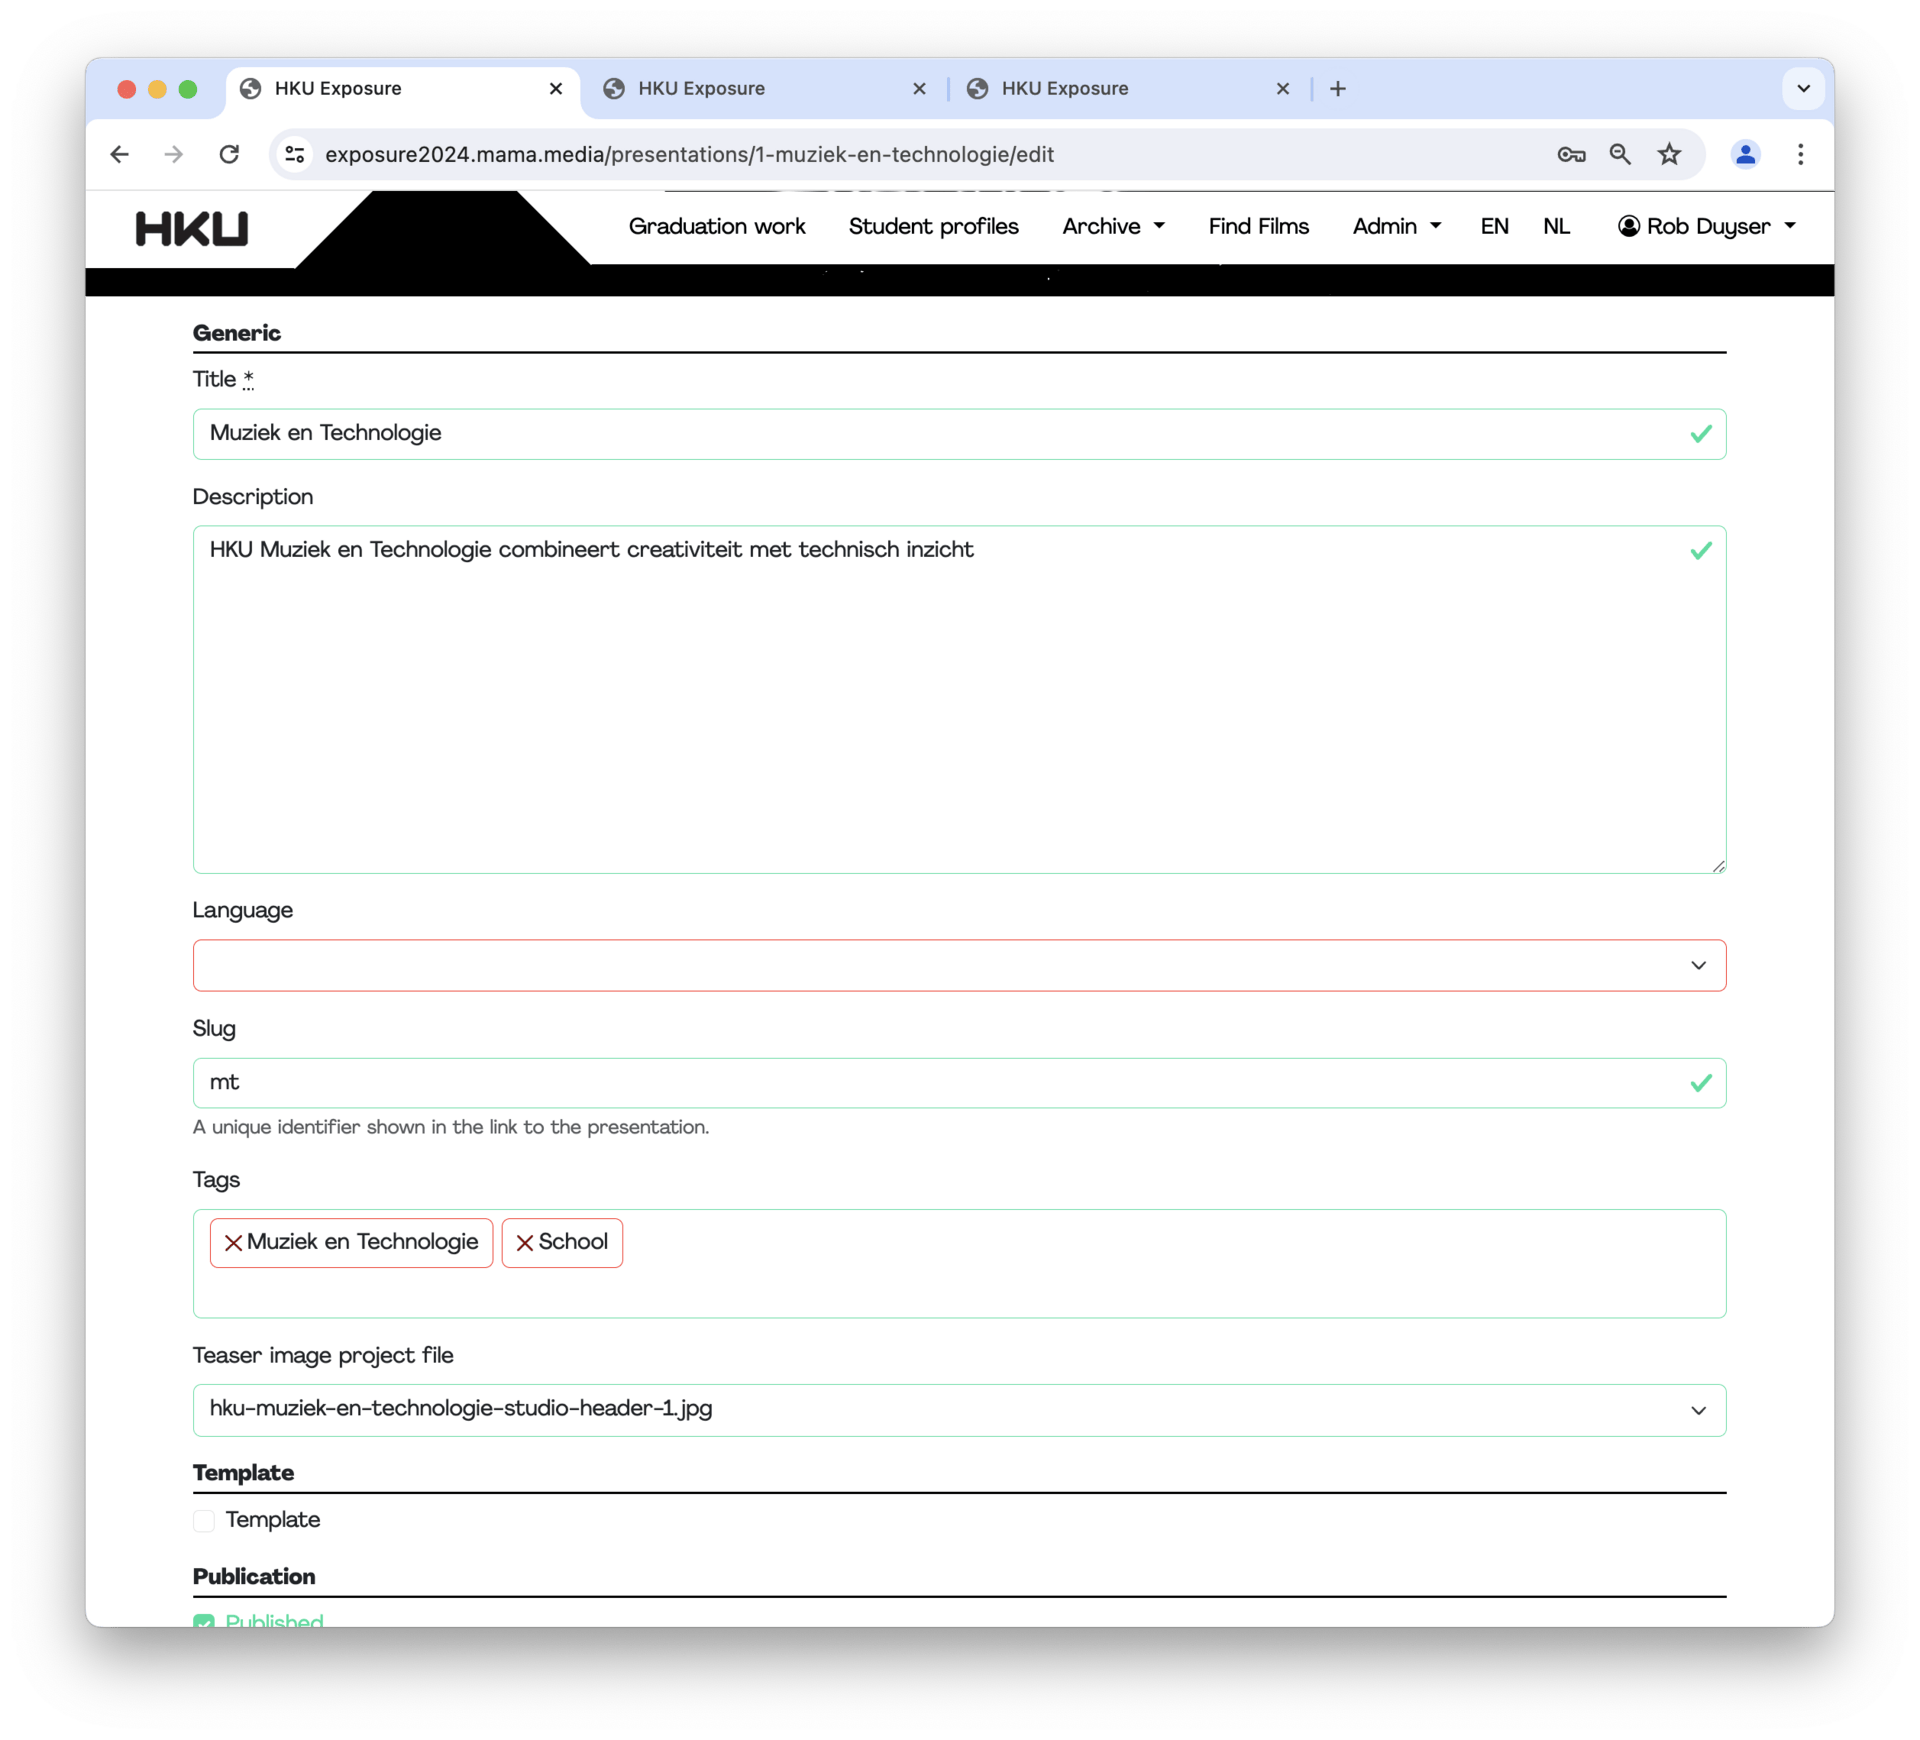
To update an existing presentation, simply click on the name in the Presentation section, and you can start editing immediately. You can also create a new one by clicking on New presentation, then fill in the form to add a title, description, etc. It is a good idea to add a short but relevant Description text, and a Teaser image, this will ensure the page looks nice, and shows an image and a tagline, when shared through messaging apps, or posted to social media. When done scroll to the bottom of the page and click on Create presentation. You will then land in the presentation editor.

Step 6 - Editing your presentations using content widgets
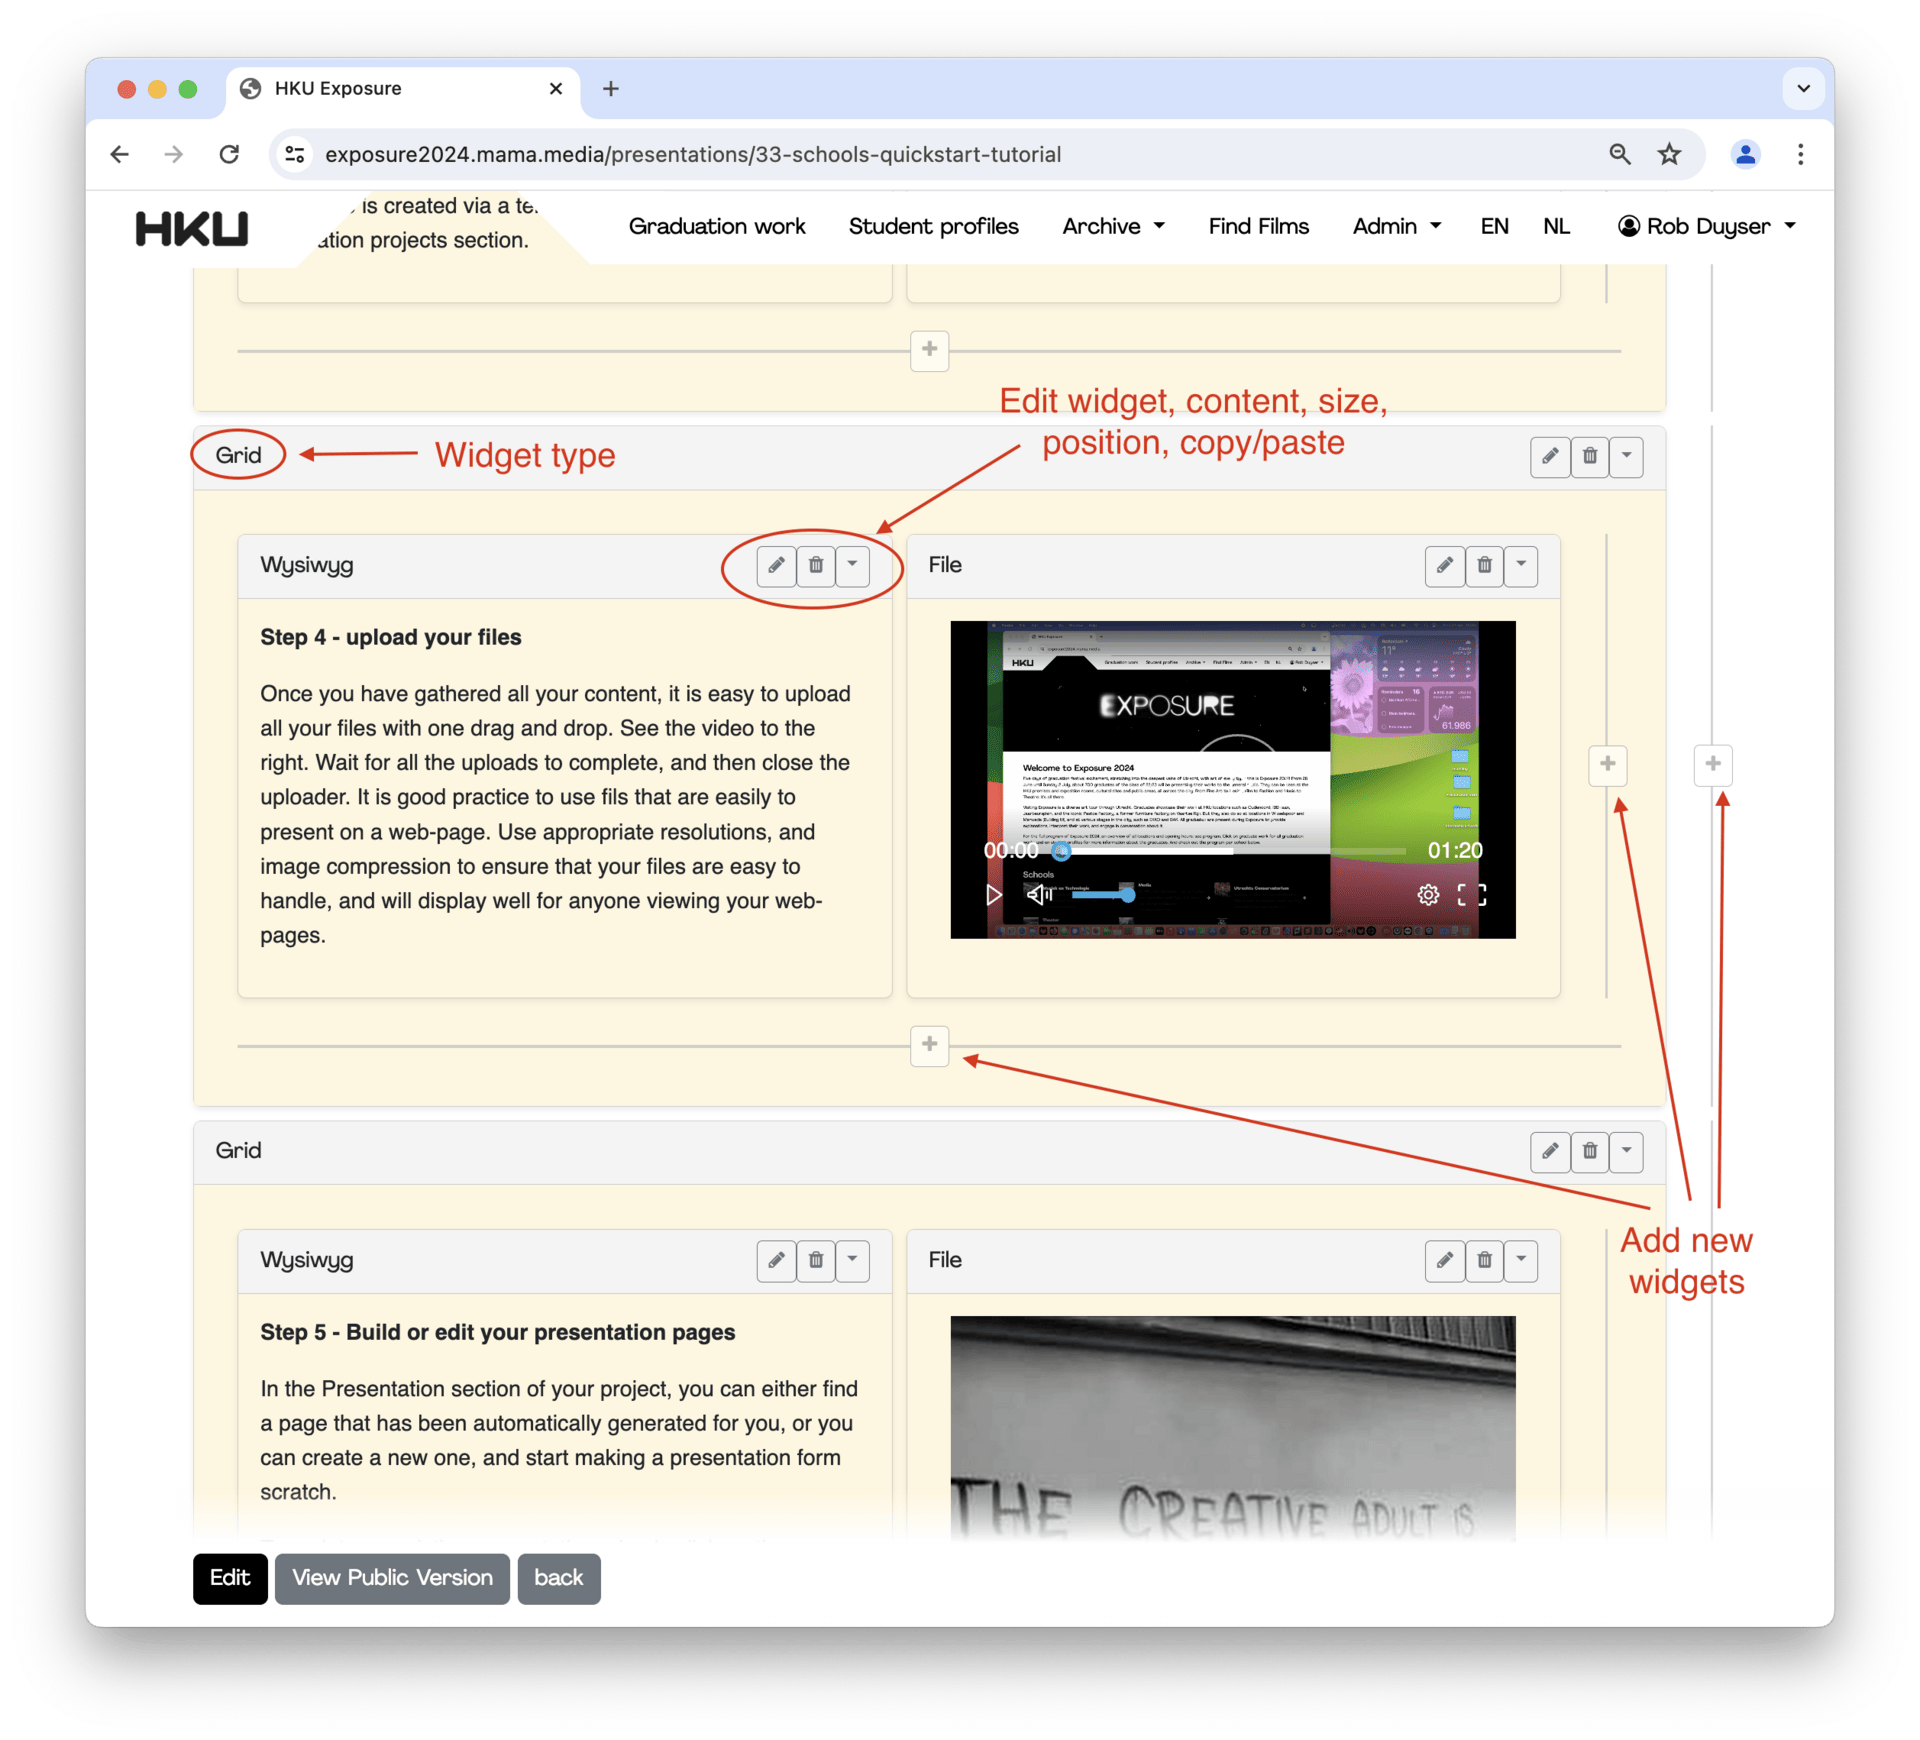
Once you land in the presentation editor, you can see that content is organised within containers if you will, or content widgets. There are various types of widgets, in almost all cases they are content type specific. A File widget adds a file (image, video or pdf) to your page, a form widget can be used to build a question, or inquiry form (the incoming data is gathered in you project), a Jitsi widget will add a Jitsi video conference call to your page. Please try them out, and play around with possibilities. A Grid widget is very handy in order to structure you page, with header, body, or side bars for example, and also to house various other widgets to keep them nicly structured. A grid widget, including it's contents can easily be copy pasted around the page, also between different presentations, even if the are in different projects.
Widgets can be added to a page using the + buttons all over the page. You can add widgets in a vertical or horizontal direction, meaning they are added either to a row of other widgets, or to a column of other widgets.
Each widget has:
- means to present it's own specific content type, and associated options
- padding and margin
- background image, video, or colour
- visibility options and hiding options
- full height option (which scale to te vertical size of the web browser, if you want to completely fill out a whole page)
Step 7 - Choose the widgets you need
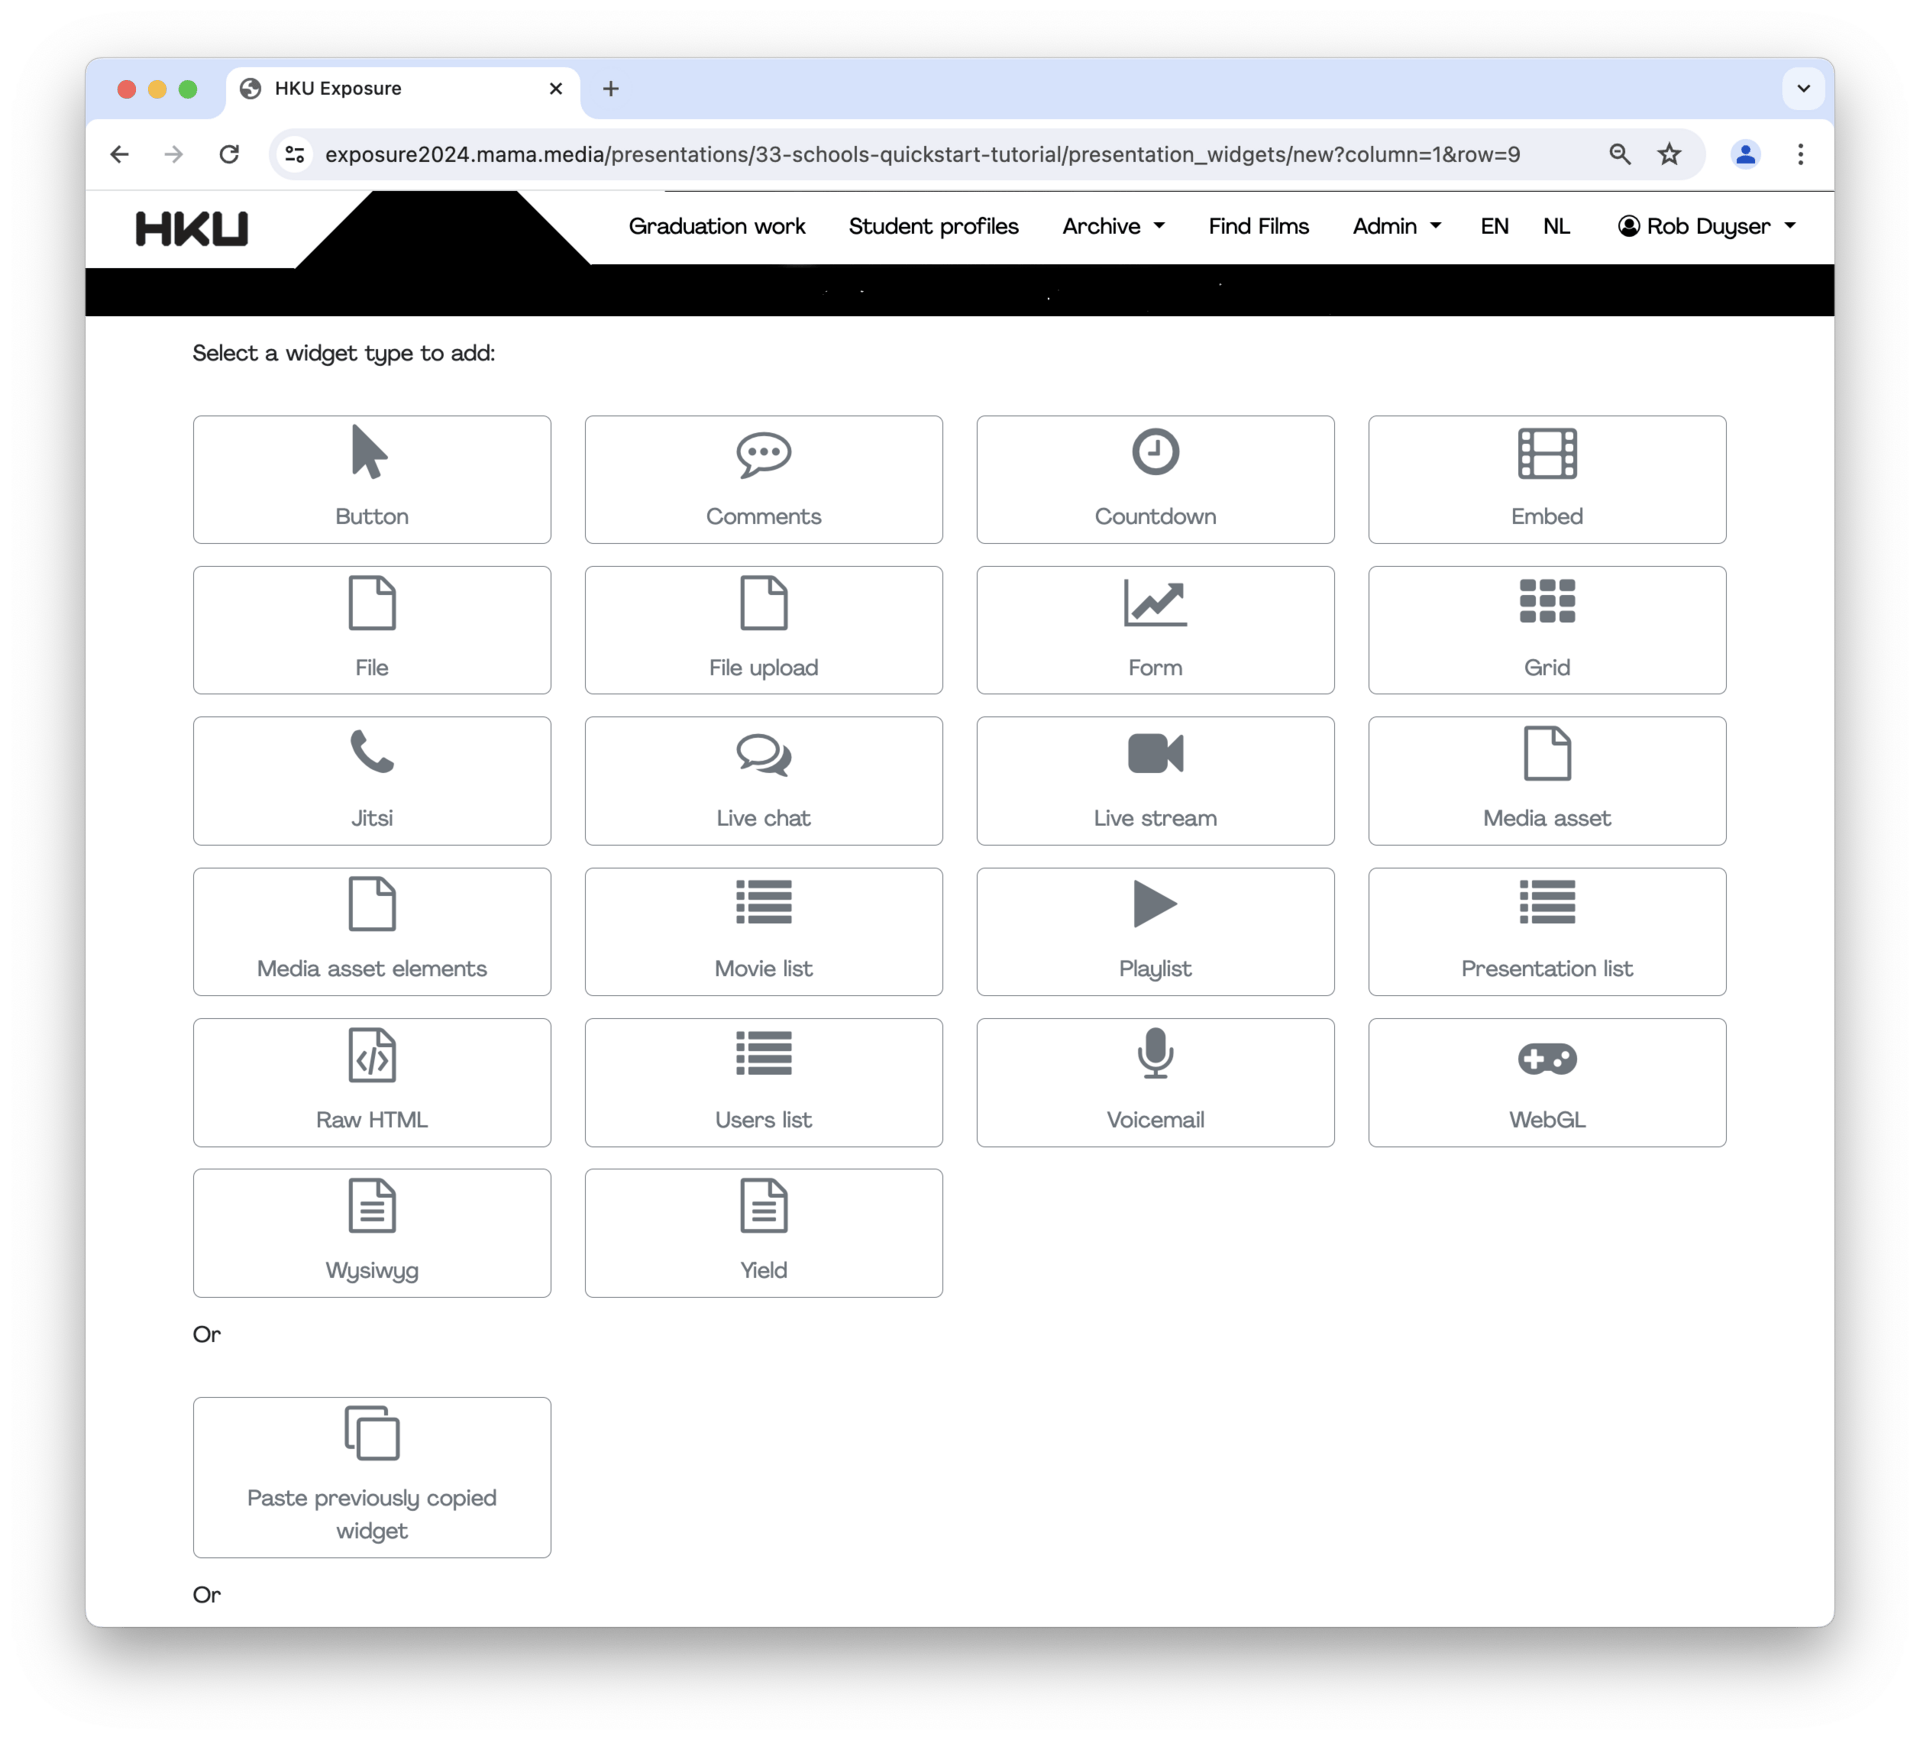
Here is an overview of all content widgets currently available.
- Button - create buttons that take the user somewhere, or download a Project file
- Comments - add a comments section to a page
- Countdown - create a countdown to take your audience to an online live event
- Embed - embed content from other platforms like youtube, twitch, soundcloud
- File - display a project file on the page
- File upload - add a file drop zone to allow user to upload to your project
- Form - build a question form, and gather data in your project
- Grid - organise multiple othe widgets in rows or columns
- Jitsi - add a video conference call to your page
- Live chat - live chat box
- Live stream - set up a live stream, and show it directly on your page
- Media asset - add available media assets to your page
- Media asset elements - asset elements are metadata attached to assets, like Title, artist, description, etc
- Movie list - automatically display a list of movies (only assets added to your project are available)
- Playlist - create a playlist of videos in side one video player
- Presentation list - create a list of other pages
- Raw html - include your own code
- User list - create a list of users to add
- Voicemail - allow visitors to leave a voicemail message on your page
- WebGL - add webGL 3D models
- Wysiwyg - what you see is what you get text editor
Step 8 - All done - now publish your Presentation
Student profile and graduation pages are published automatically. This is because each graduation project is already linked to the student, and the school and field of study are automatically added.
Schools and fields of study pages need to be tagged as such. These have also been prepared, so we expect that in most cases the involved creatives only need to edit the existing pages.
Step 9 - User support
Mama.media helpdesk is available should you get stuck. If you want to build something, but can't find a way - not to worry. We are here to help. Send an email to support@mama.media. Briefly describe your problem and include a URL - a link to your presentation or project helps us to act and respond quickly. We answer by email, and can also do support calls on request.
